
So you wanna change the theme on your WordPress site?
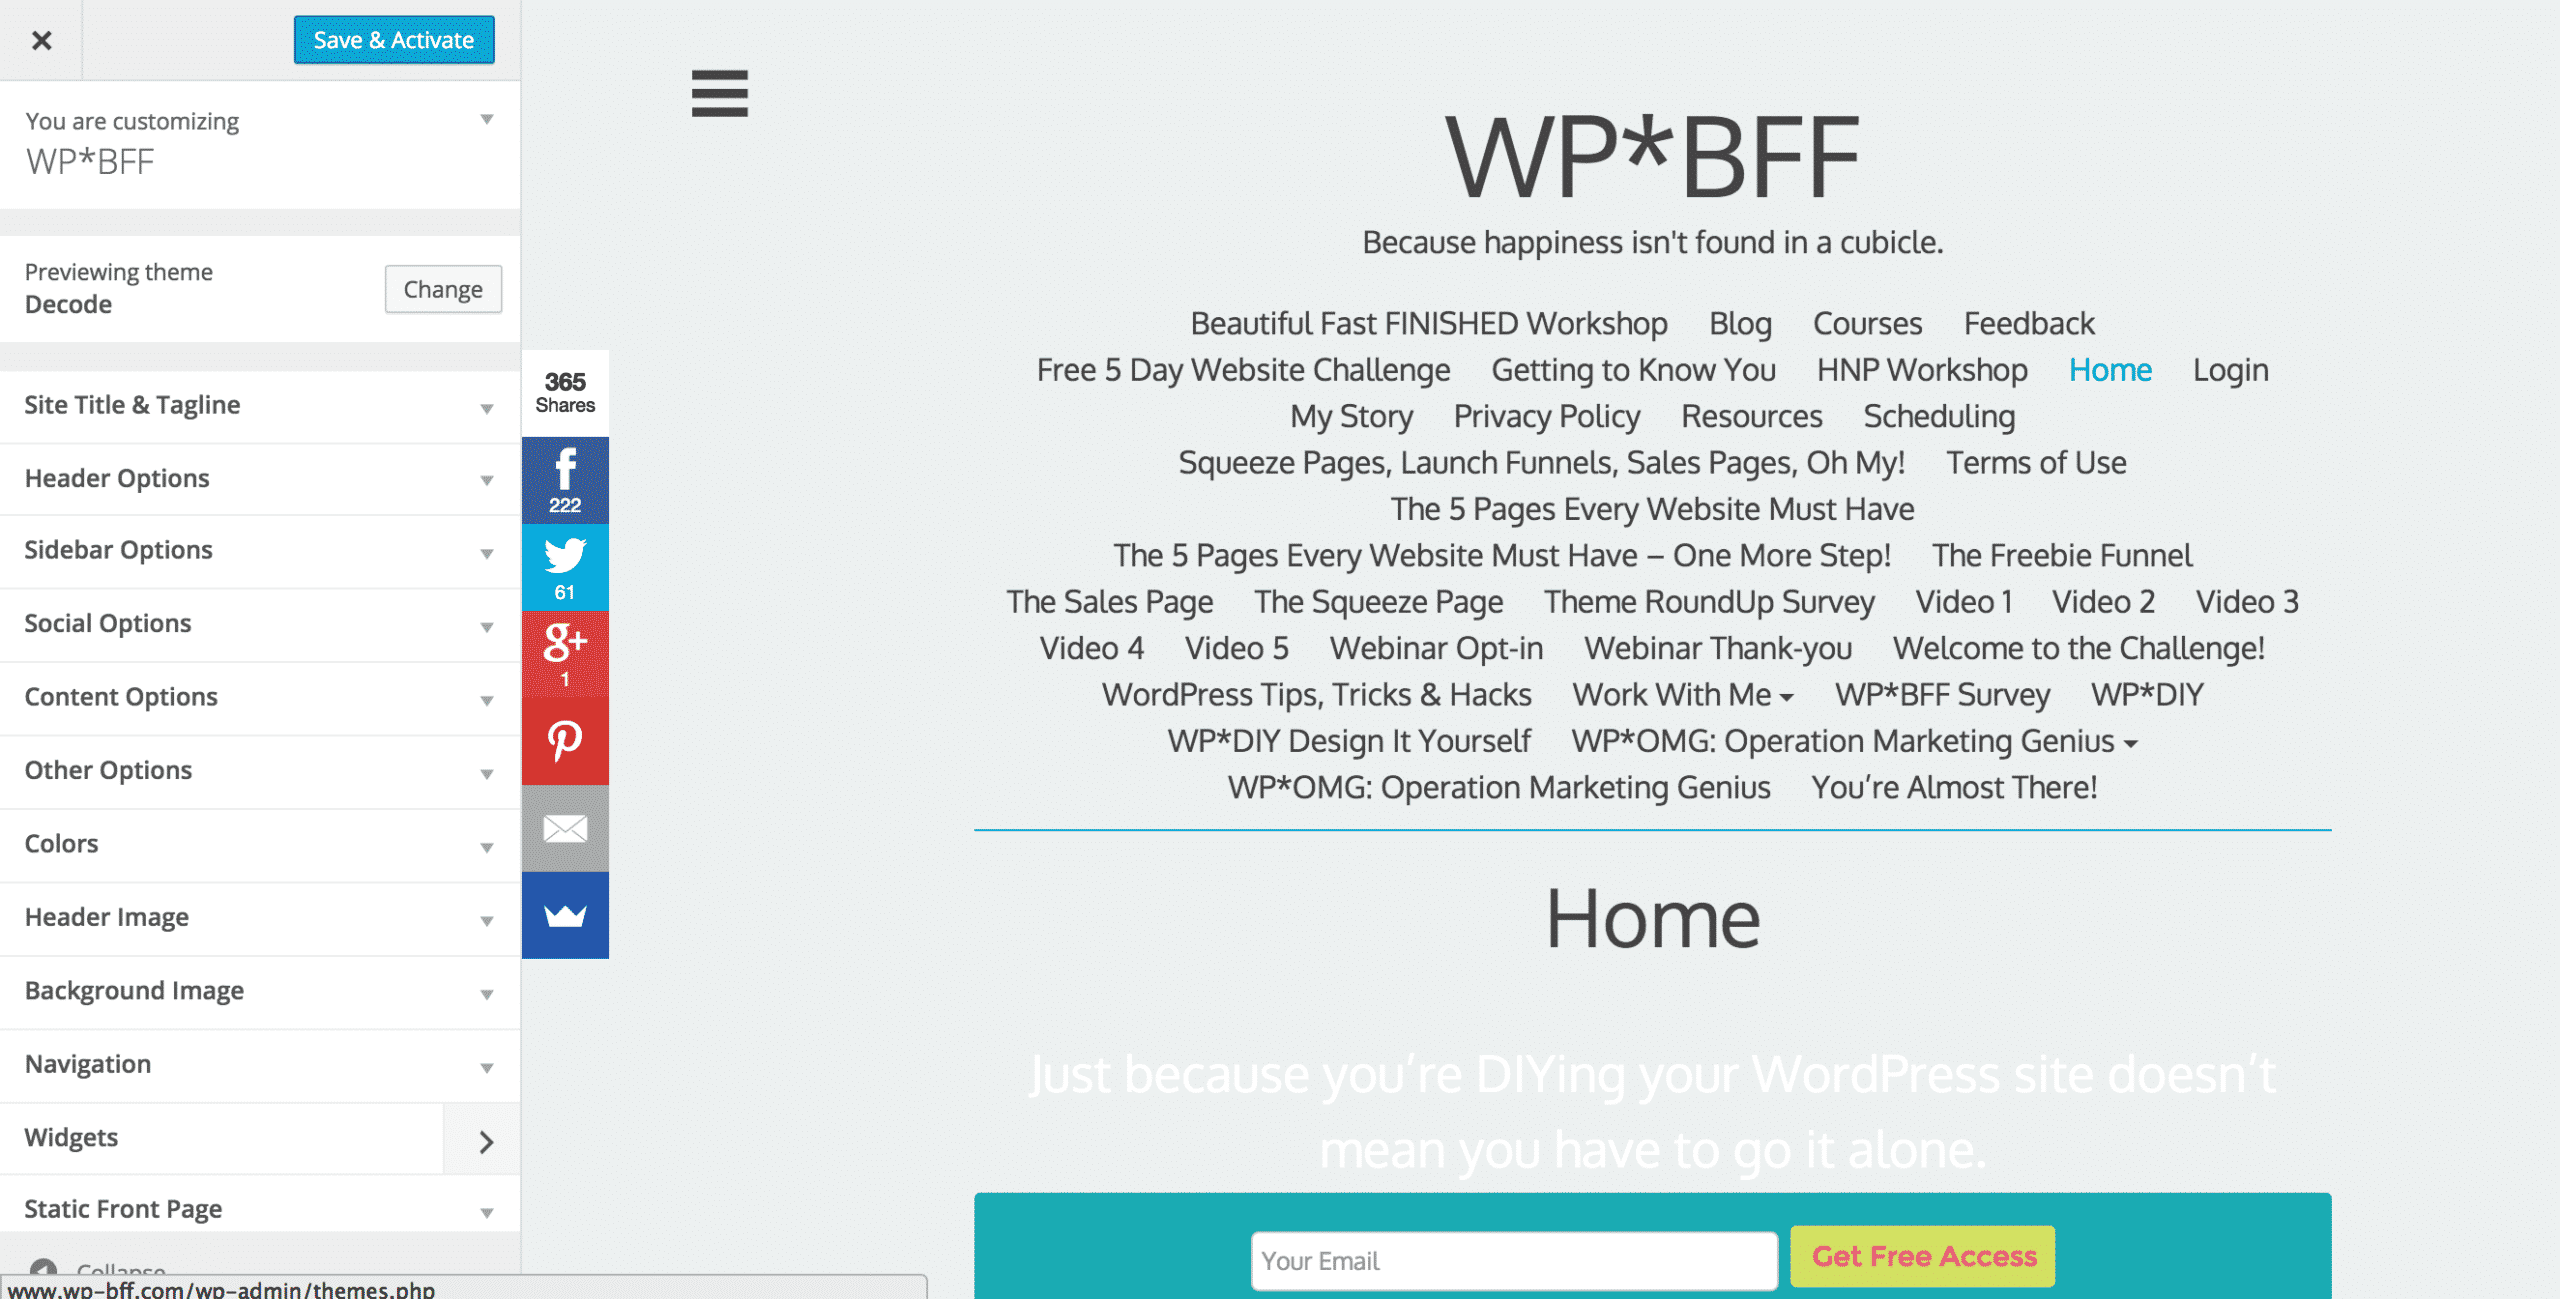
With many WordPress themes – especially those like Make that use WordPress's standard theme options, changing the theme is as simple as installing the new theme, clicking on Live Preview mode, customizing all of the theme options and clicking “Save and Activate”.
But for powerful drag-and-drop premium themes like Headway, Studiopress, and Divi, you can't just activate them on your live site – there's quite a bit of work that would need to be done before your site would look any kind of normal!
So there are a couple ways you can go about it:
1) Put up a maintenance page on your website, and then install, activate and customize the new theme and when you're done, take the maintenance page down. This is the easiest way, but involves some downtime to your site.
2) Create a subdomain, install WordPress on that subdomain, clone your current site to it, download, install and activate the new theme, customize it, and then clone it back to your live site. This way is more complex, and the cloning process can be frustrating, but it lets you keep your site live while you work on the new one. The only downtime is when you restore the new site over your existing one.
If you want to go route #2, here's how:
Note these instructions are for Bluehost. If you are using another hosting provider and are unsure how to set up a subdomain, contact their customer service.
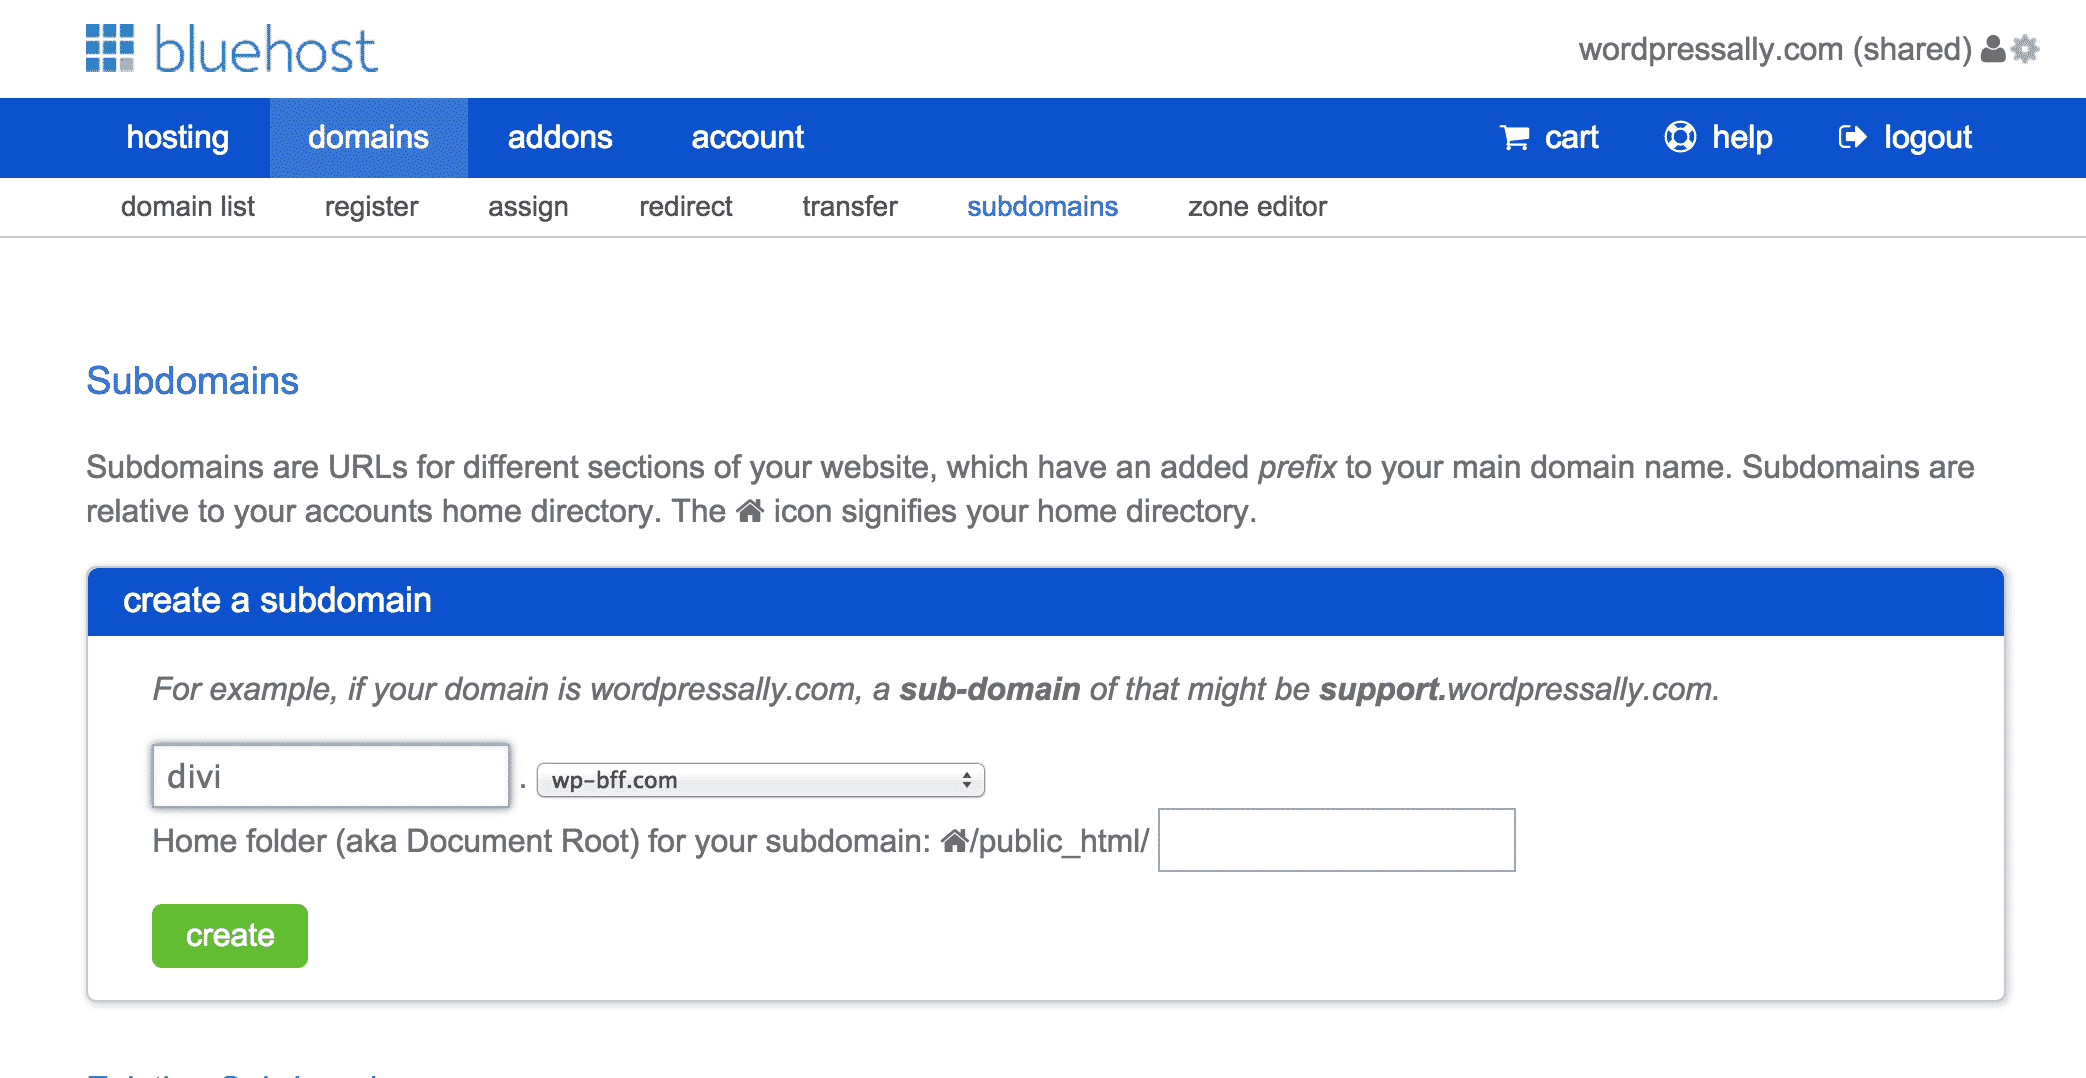
1) Log in to your Bluehost account and click on Domains > Subdomains and enter whatever you want your subdomain to be. I'm choosing divi because that's the next theme tutorial I'm going to create. Then click the green “Create” button.
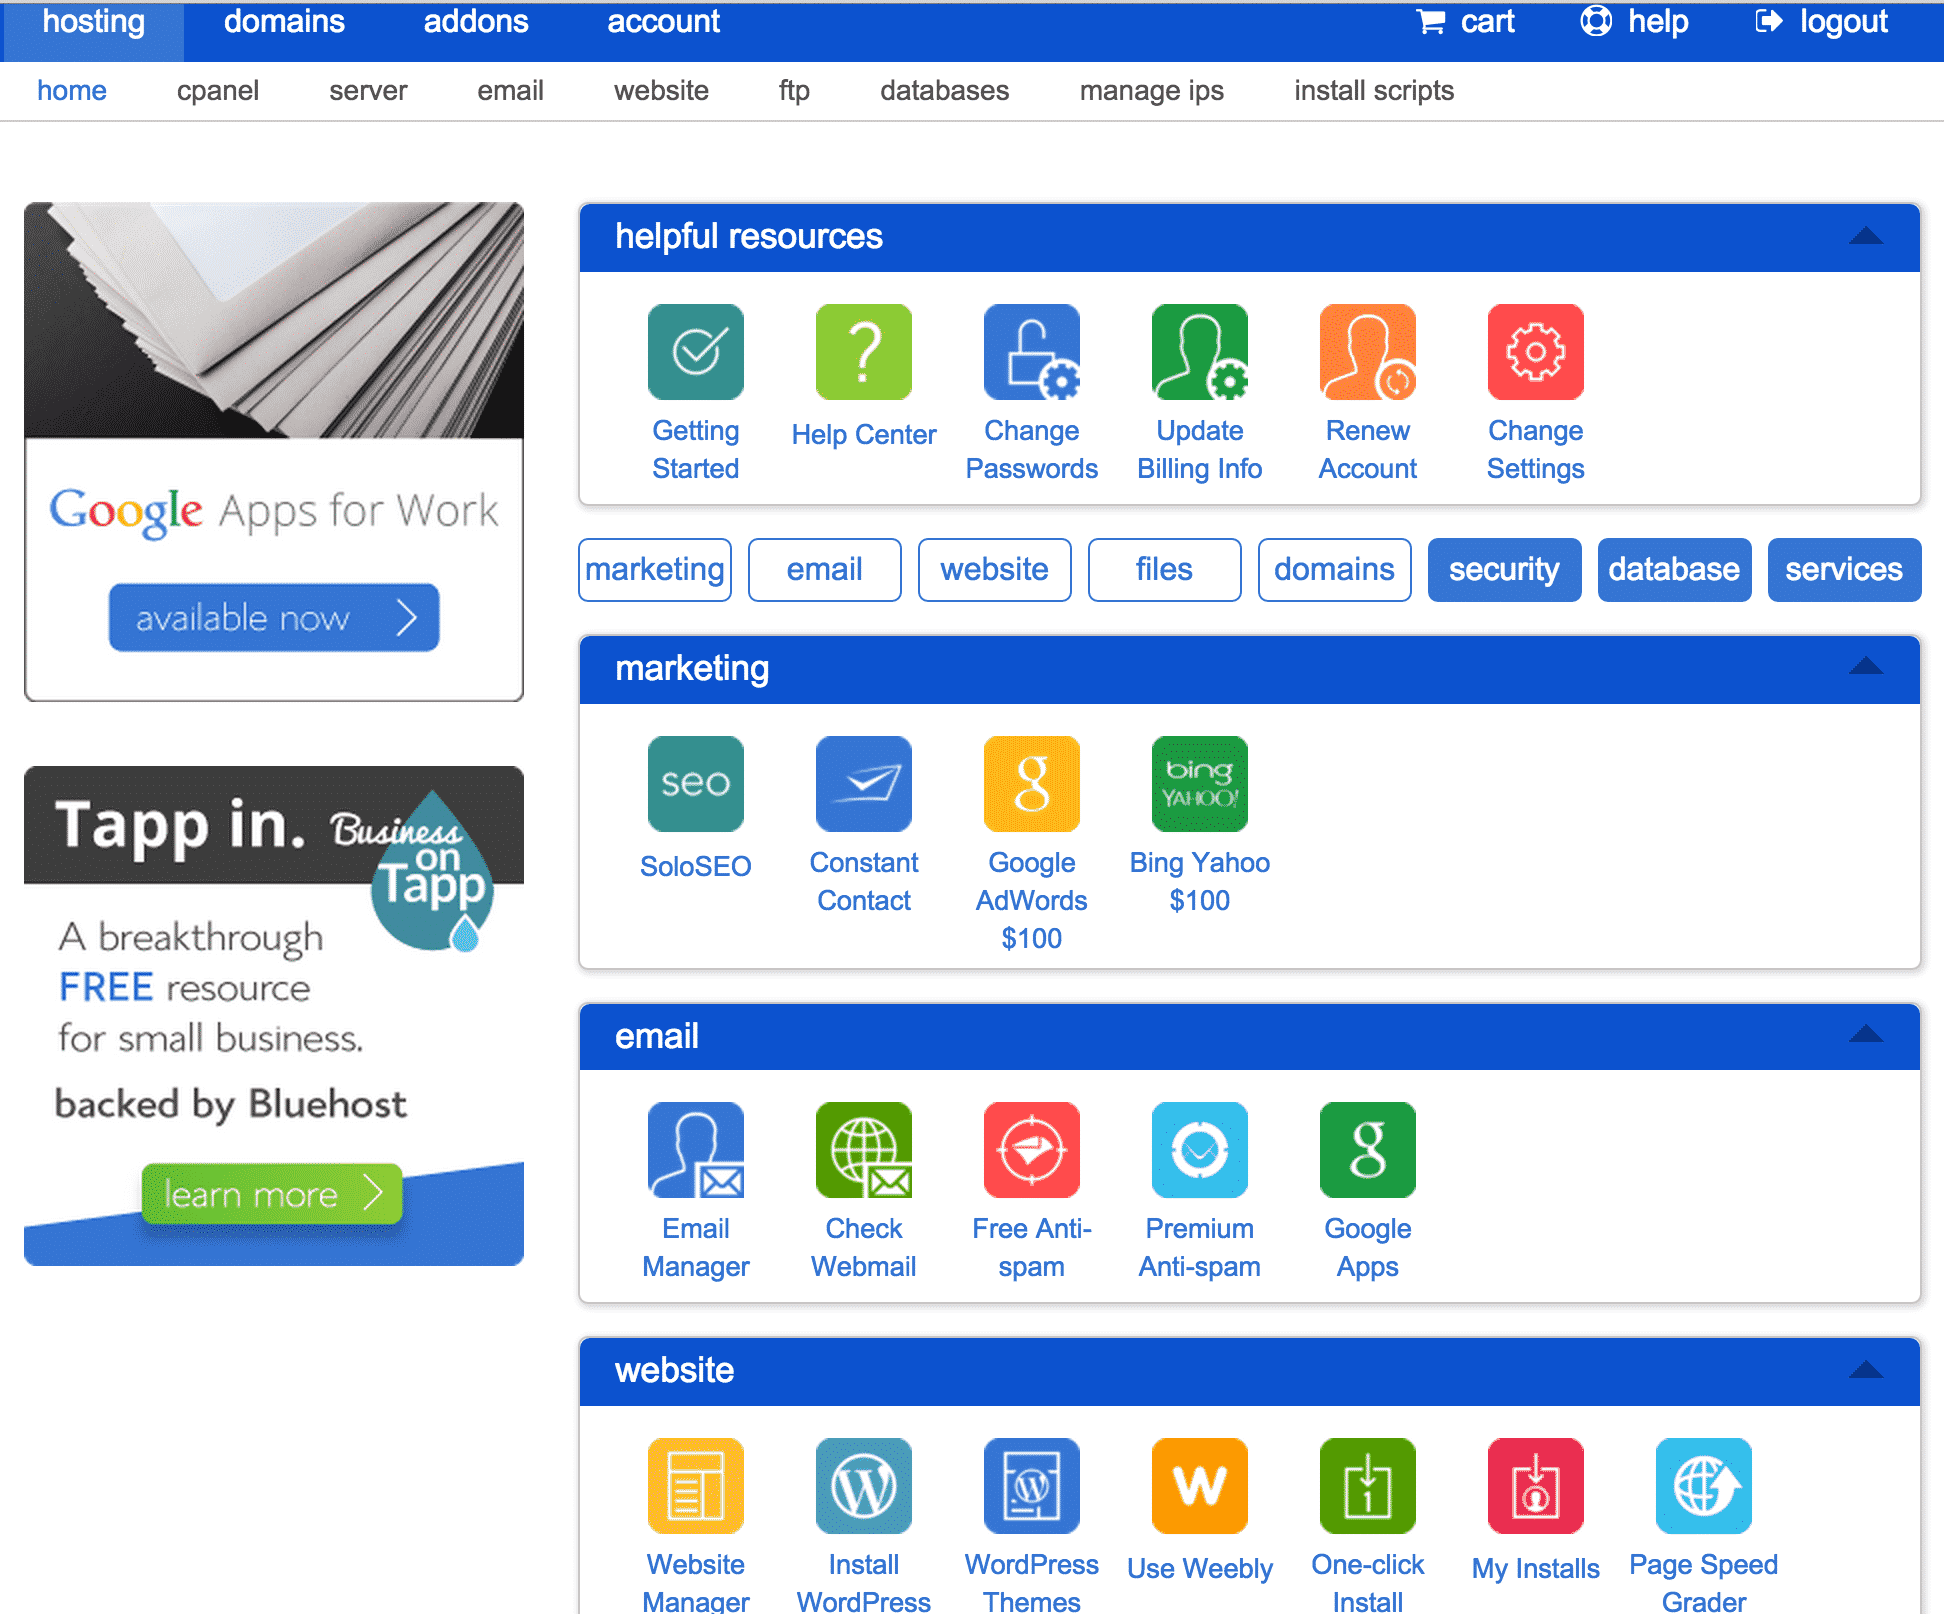
2) You'll get a confirmation that the domain was created. Then go to the top of the page and click on Hosting in the main navigation, and then scroll down to the Website section and click “Install WordPress”
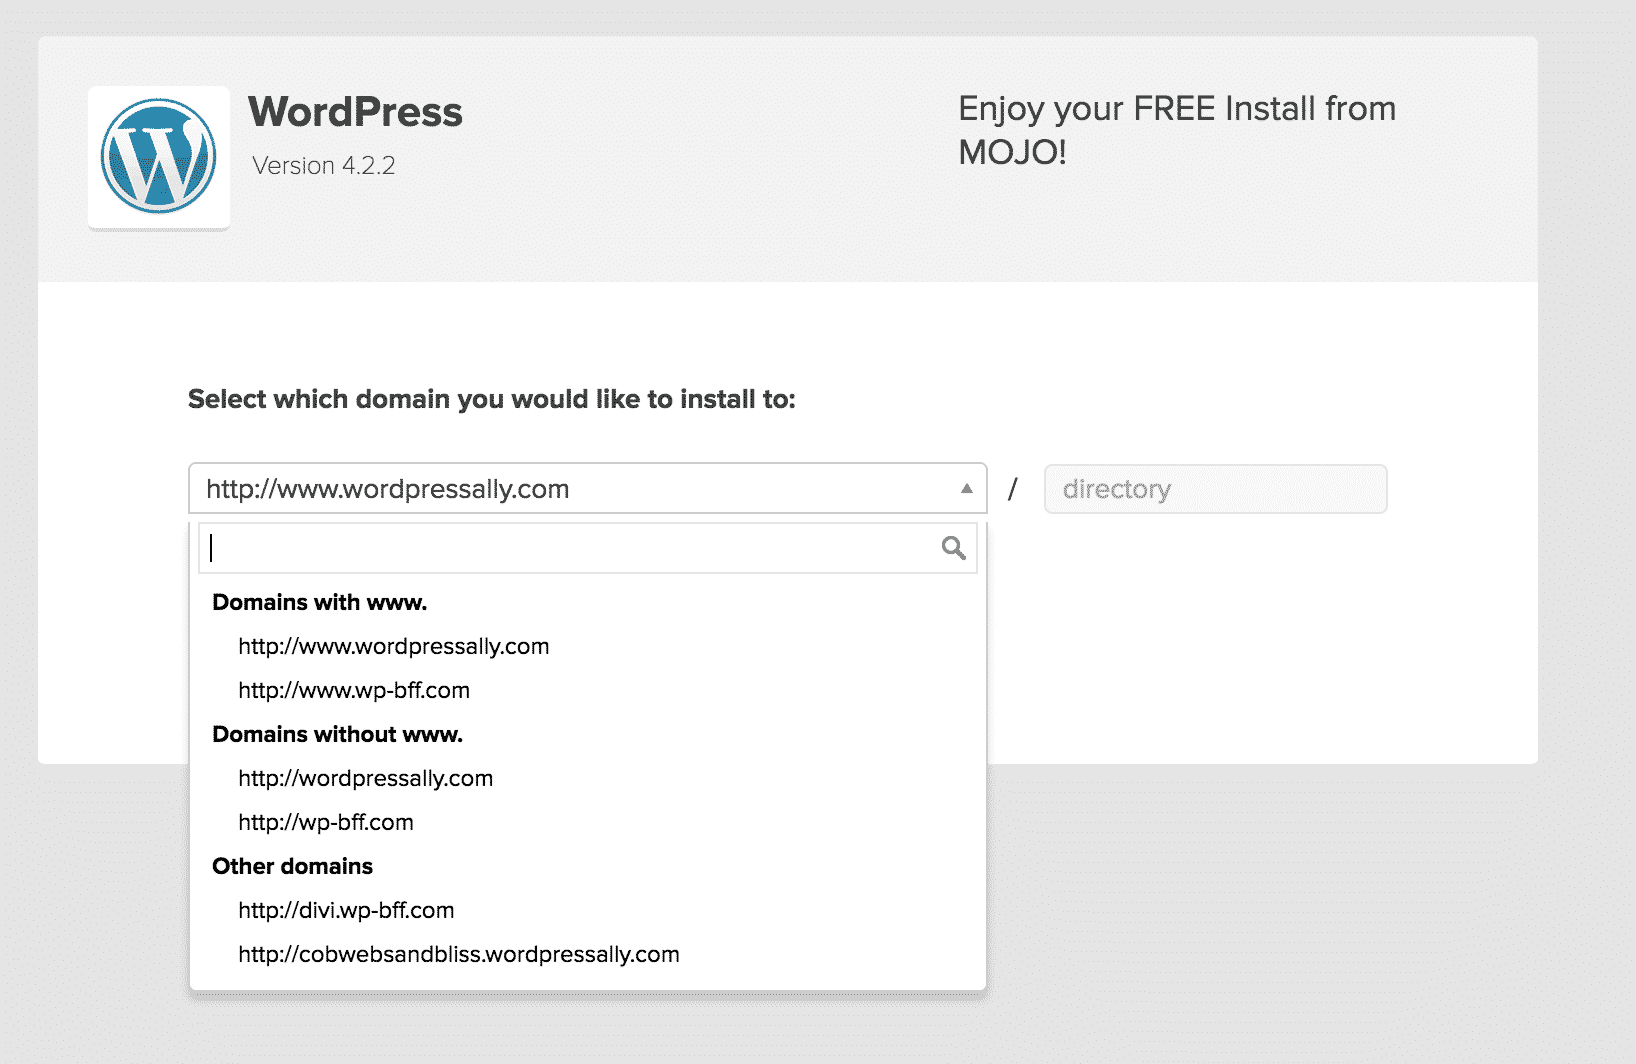
3) Click Install, then select the subdomain you just created from the drop-down, then click Check Domain.
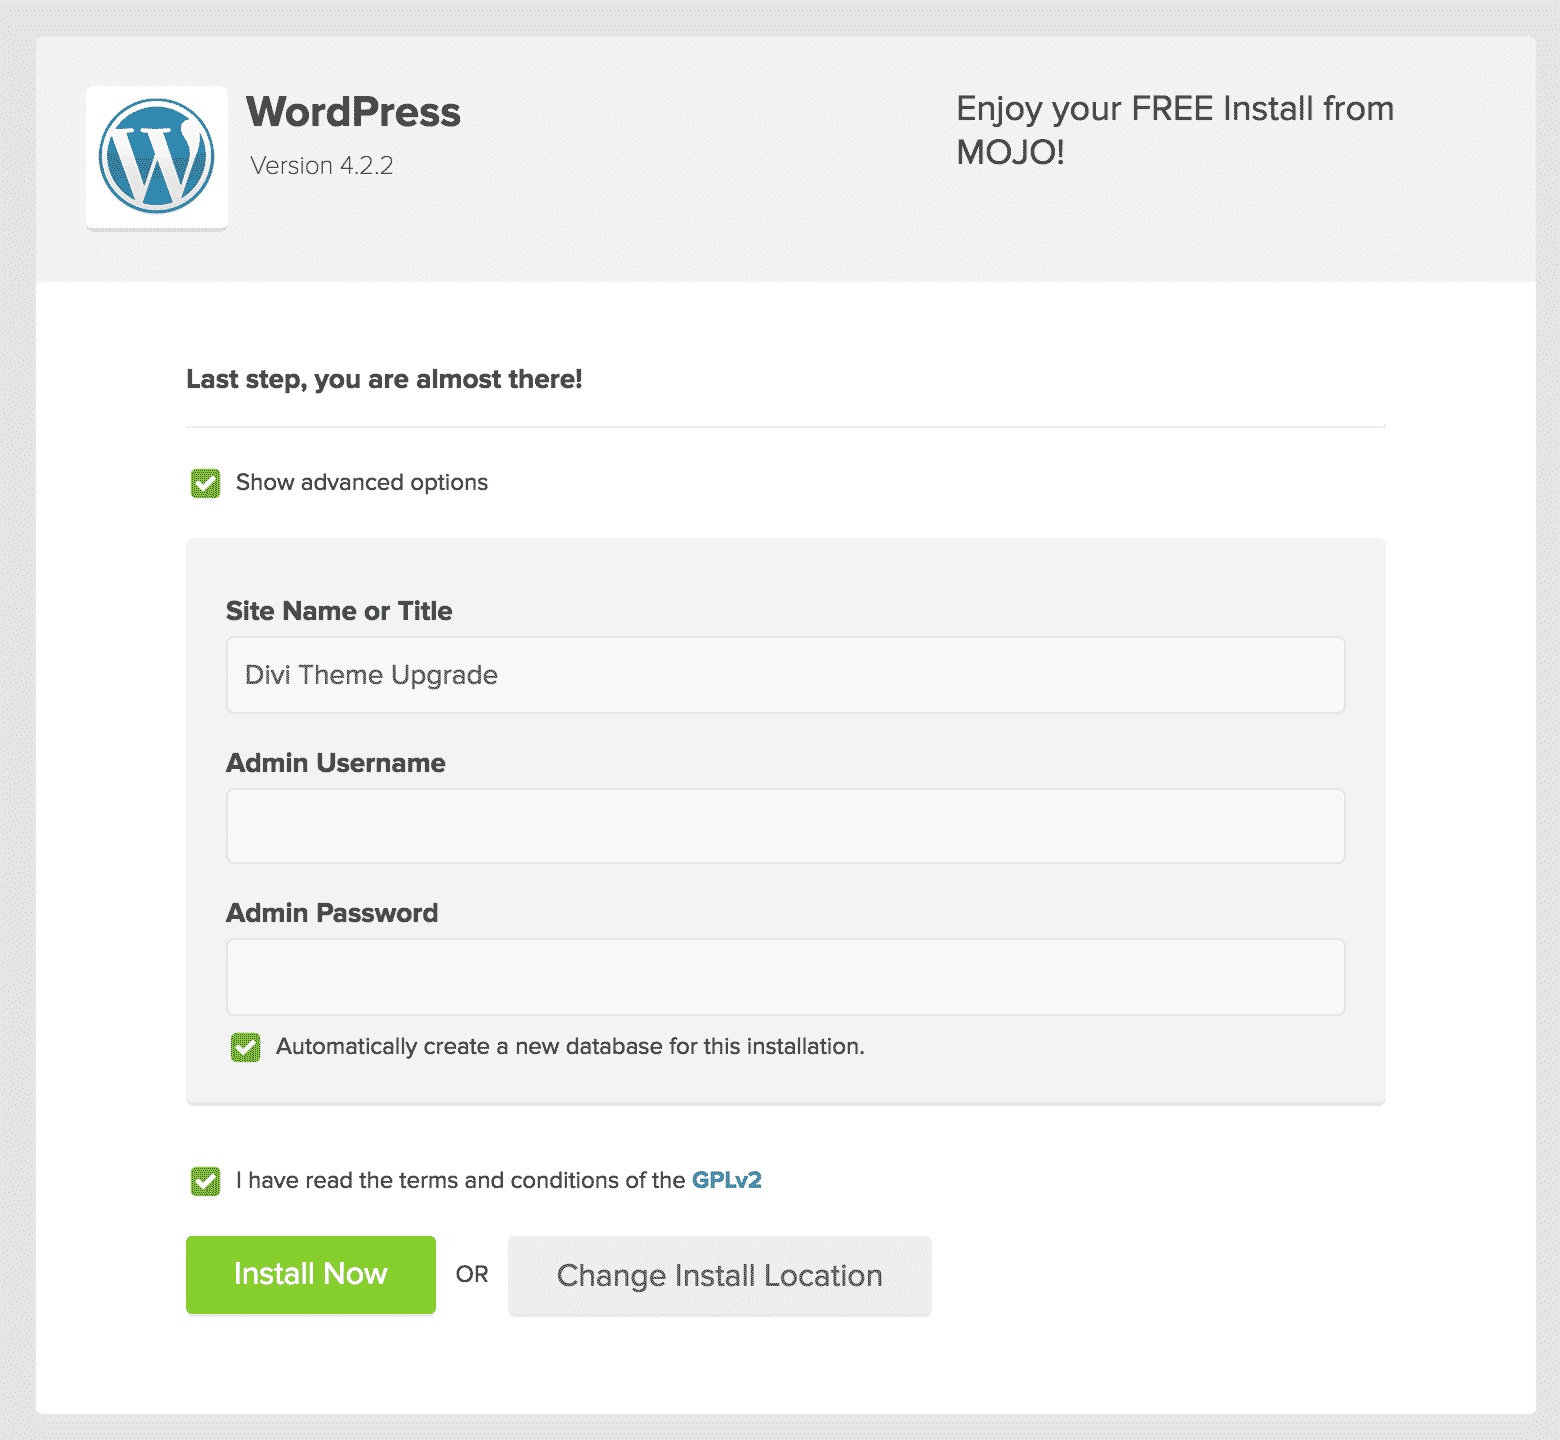
4) Click the Advanced Options button, enter your site title, your username and password, check the Agree to Terms box and click Install Now.
5) While you're waiting for WordPress to install, you're going to clone your existing WordPress site. There are many different plugins and services that will do this – but I'm going to recommend ManageWP – because I use them for the 20 WordPress sites I manage at my day job, on all the freelance sites I've done and their customer support is an 11 on a scale of 1-10. Clones can be tricky, and these guys are thebomb.com.
This is not a free service (it costs 4 bucks a month), but there is a 2-week free trial, which should be enough for you to get this part of the tutorial. As a side note, I'd recommend spending the $4/month for all the other features ManageWP provides, but that's a tutorial for another day.
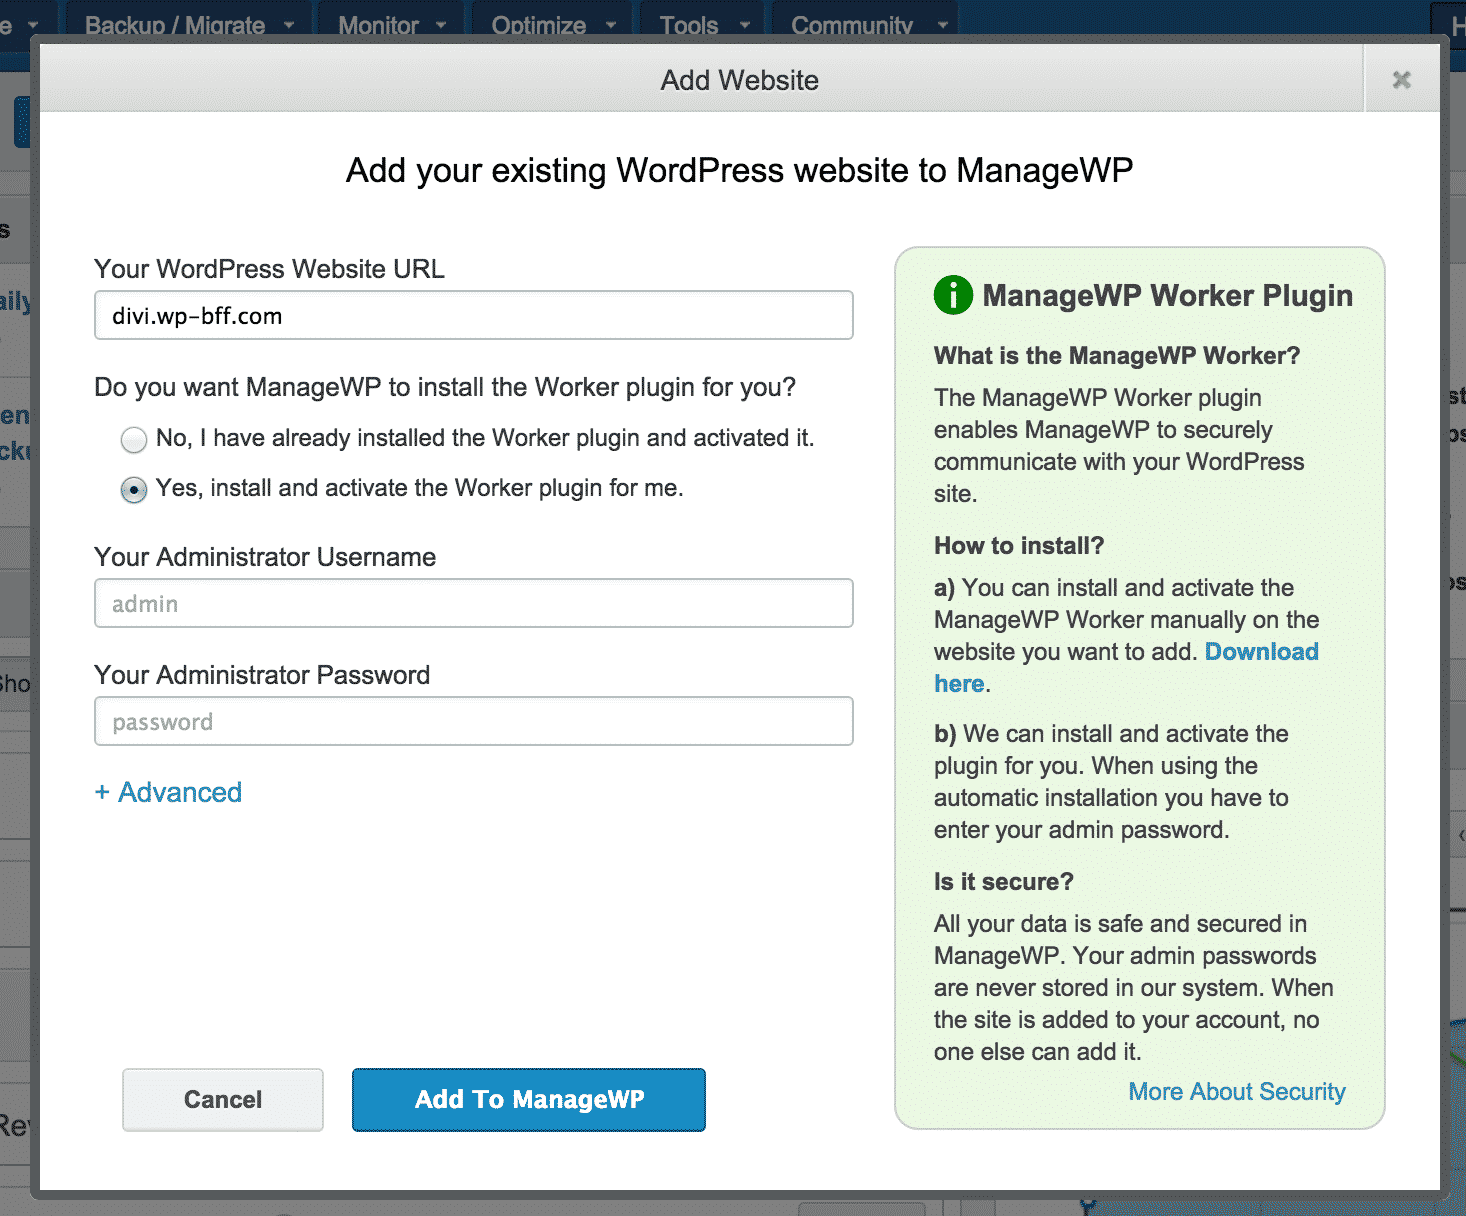
So go to ManageWP, create an account, and follow the steps to add your current website to ManageWP. Click the green Add Website button in the bottom-left corner of the screen, enter your URL, select “Yes, install and activate the ManageWP worker plugin for me.” and then enter your website username and password, and click Add to ManageWP.
6) By now, your new WordPress installation should be ready on your subdomain, so repeat step 5 to add it to ManageWP too.
7) Once you have both sites added to ManageWP, click on Backup/Migrate > Backups and make a backup of your existing site! This is super important in case you screw something up later.
Then, click Backup/Migrate > Clone/Migration Wizard.

8) The wizard will open and you'll be prompted to select a source and destination. The source is your current website. Select it, and you can ignore the Advanced Options. Wait while ManageWP takes a snapshot of your website, and then select the Destination, (the subdomain you just set up). Once the source and destination are set, you'll see this. Make sure that your source is your current site and the destination is the new site!! Otherwise you'll overwrite your existing site with a blank WP site and that would be very sad…
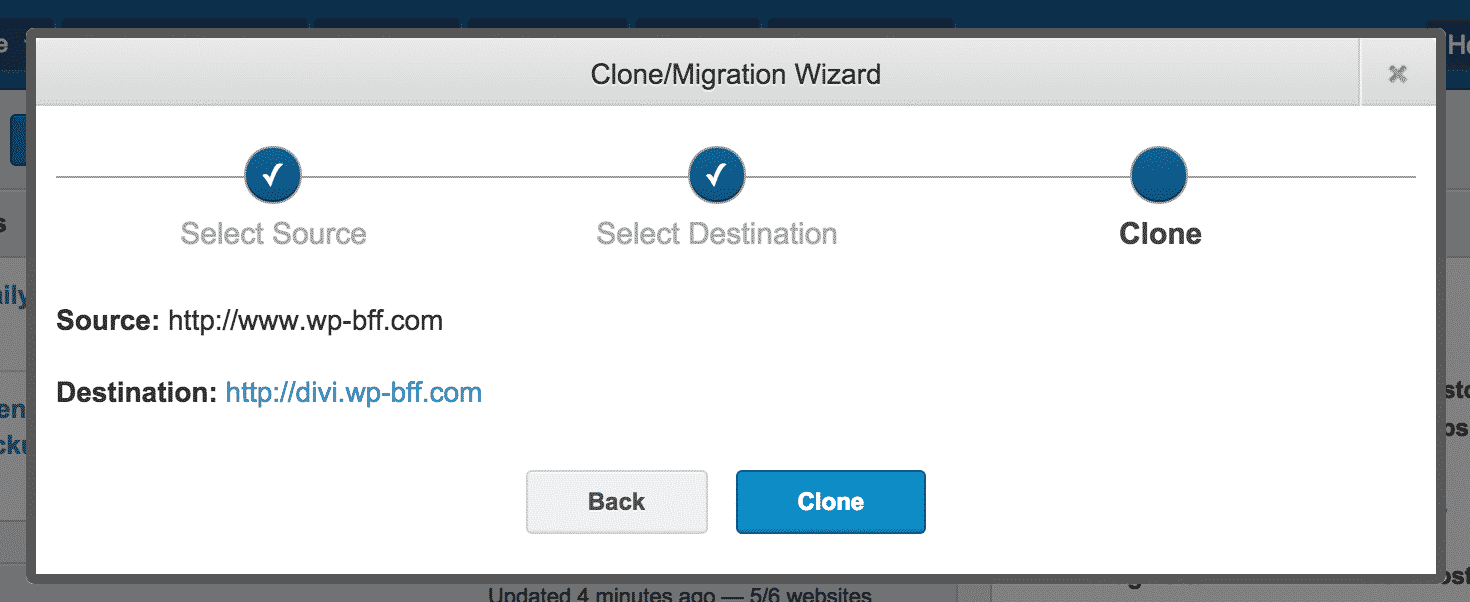
When you 100% for sure that you are cloning your existing site to your new site and not the other way around, click Clone.
Once the clone is complete, go to your subdomain (mine is divi.wp-bff.com) and you'll see that it looks exactly like your current site. Log in, and then you can download and install and start configuring your premium theme.
9) Once you're done and you're ready to copy it back to the main site, just do the Clone/Migration Wizard again, but this time your source is your subdomain, and your destination is your current site. Be sure to make backups of both your main site and your subdomain first just in case!
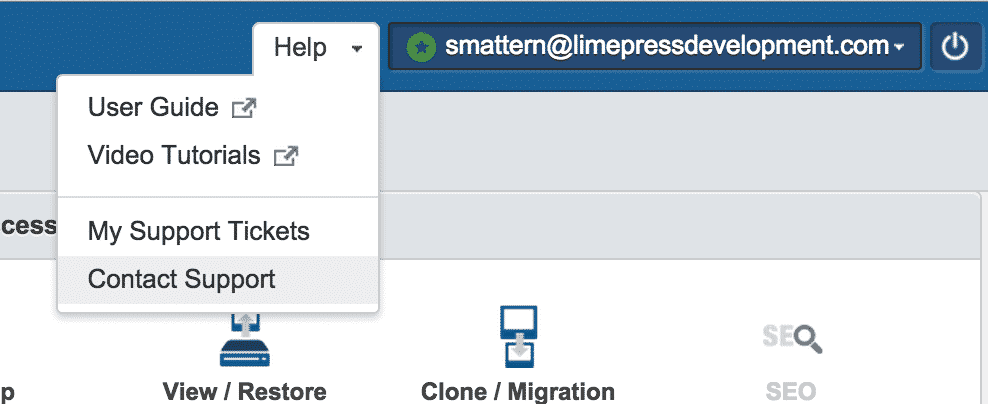
If you run into any errors with the backup or cloning process, Click Help in the top-right of the ManageWP dashboard, then Contact Support to create a support ticket.
Have fun playing with new themes!!!